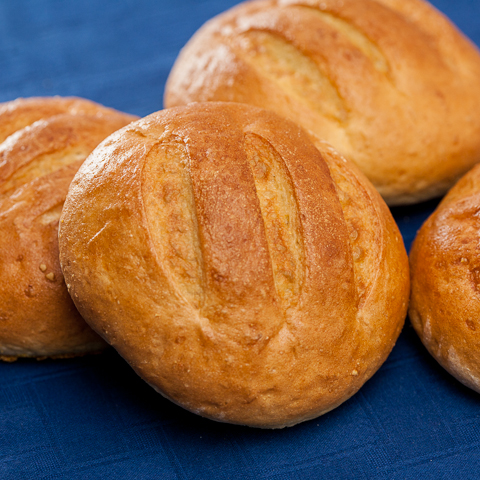
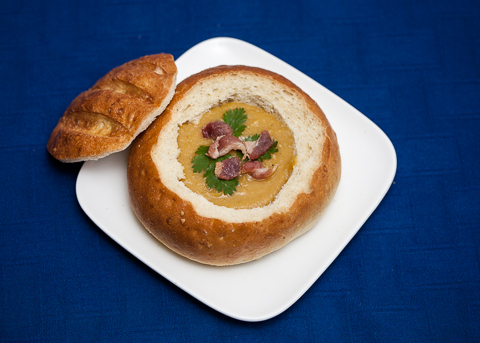
The soft, tender interior of these crusty, leak-proof bread bowls soaks up a thick, hearty soup without getting soggy. They’re perfect vessels for turning your favorite soup into a mood-lifting meal.
For me, sometimes all it takes to transform the bleak dreariness of a rainy day into cozy comfort is a warm bowl of soup.
Since I know that soup can impact my outlook as the days grow shorter, darker, and more damp here in the Pacific Northwest, I’ve been proactive about making it this fall.
So far I’ve prepared chicken noodle soup, curried butternut squash-pear soup, and Cuban black bean soup.
One lucky week, my friend Sharalyn dropped off some cheesy broccoli soup; I can attest that soup made by a friend has super-duper enhanced mood-lifting properties (and yes, that pun is intended.)
And so, despite the crummy weather, I found the energy — fueled, of course, by all this soup — to tackle bread bowls.
My first attempt resulted in failure. Ambition tempted me to shape far too many bowls from one batch of dough; instead of bowls, I ended up with dinner rolls.
Since complaining about eating homemade soup with fresh rolls seems hypercritical, I counted it as a successful failure (notice the positive spin here, which I attribute entirely to soup).
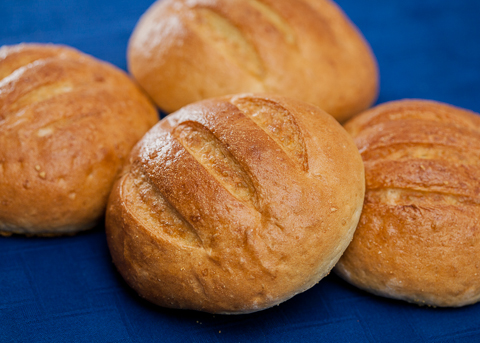
Now I know that dividing the dough into four (not eight!) pieces results in generously-sized bread bowls. They bake into crusty, leak-proof vessels that, when hollowed out, provide plenty of room for a main course serving of soup.
The soft, tender interior soaks up a thick, hearty soup without getting too soggy, making it nearly impossible to resist eating up the bread bowl once the soup has disappeared.
If you’ve prepared a large pot of soup to enjoy throughout the week, making bread bowls to serve it in doesn’t add much effort to your meal planning on a given day. And, as an added benefit, while you’re creating tasty vessels for your soup, you’ll fill your house with the comforting aroma of freshly baked bread.
If you really want to banish the misery of a cold, rainy day, make a double-batch of bowls. Go drop off soup and freshly baked bowls at a friend’s house. If that doesn’t completely transform your mood, nothing will.
Bread Bowls
Adapted from The Bread Bible. Makes four bowls.
2 cups warm water (105° to 115°F)
1 1/2 tablespoons active dry yeast
1 tablespoon sugar
5 to 6 cups all-purpose or bread flour
1 tablespoon salt
cornmeal, for sprinkling
1 large egg beaten with 2 teaspoons water, for glazing
Pour the water in the bowl of a heavy-duty standing mixer. Sprinkle the yeast and sugar over the surface of the water. Stir until combined. Let stand at room temperature until dissolved and foamy, about 10 minutes.
Add 2 cups of flour and the salt. Beat hard with the paddle attachment until smooth, about 2 minutes. Add remaining flour, about 1/2 cup at a time, until a shaggy dough that clears the sides of the bowl forms.
Switch to the dough hook and knead for about 3 minutes or until the dough is smooth and springy.
Place the dough in a deep greased bowl. Turn once to coat the top and cover the bowl with plastic wrap. Let rise in a cool area until tripled in bulk, about 1 1/2 to 2 hours. If you have time, punch down the dough and let it rise again for about an hour.
Gently deflate the dough. Turn it out on a lightly floured surface. Line a baking sheet with parchment paper and sprinkle it with cornmeal. Divide the dough into 4 equal portions. Shape the portions into tight round balls. Place the loaves about 4 inches apart on the baking sheet. Cover loosely with plastic wrap and let rise until puffy and doubled, about 30 to 40 minutes.
Preheat oven to 450° F.
Make three 1/4-inch deep slashes on each loaf and brush the surface of each one with the glaze. After placing loaves in the oven, reduce temperature to 400° F. Bake for 30 to 35 minutes or until crusty and the loaves sound hollow when tapped with your finger. Transfer the loaves to a cooling rack.
To hollow the loaves, cut into the bread approximately one inch from the edge with a serrated knife. Continue to cut around the loaf, leaving about an inch of thickness on the outside edge all the way around. Do not cut through the bottom of the loaf. Using your fingers, pull the bread from the center of the loaf. Use the knife to cut away any hard to remove pieces until the bowl is cleanly hollowed out. Fill with soup and serve.
Some of the links in this post are affiliate links. If you click through and make a purchase, I earn a small commission for my referral at no additional cost to you. Thank you for supporting Flour Arrangements.


It’s been in the 90’s here! I am dying for cold wet weather to enjoy a bowl of soup!
Just popped them in the oven. I am so excited. I made butternut squash soup this morning. I got to thinking about cleanup. I don’t have to wash any bowls! An added plus.
So, why I love bread bowls, they make the soup dinner a very special, festive meal. What fun to have a bread bowl with homemade soup!
I agree — somehow they make a simple meal feel extraordinary!
Tried this out over the weekend. The bread came together sublimely! Great crisp crust, nice even crumb. Perfect for eating with soup. My roommates were very impressed. 🙂
So glad the bread was a hit at your house, Sameera!
Do you think that this could be made into 6 bowls for a lunch time crowd? You said that splitting into 8 is way too small, but I’m hoping that 6 will work…. (I’m wanting my advanced class to make this for a catering job, but this crowd never eat a whole ton.)
Absolutely. I’d probably reduce the baking time a bit, or just check them early to make sure you don’t over-bake the bowls. Please share how they turn out!
Just made these bread bowls for my family and my son is bragging to his friends that his mom can make bread from scratch! The recipe was easy ti follow and the bread turned out delicious! Thanks for making me a superstar in my house! Lol
Hooray! I’m so glad!
what if you dont have a stand mixer?
You can totally do this by hand! Just work the flour in with a wooden spoon until you can no longer mix easily. Transfer the dough to a flour dusted surface and knead the rest of the flour in bit by bit! Good luck!
Can I use Bread Machine Rapid Rise yeast? Or, should I just run out and get the Active Dry Yeast? (I’m not a breadmaker–yet!!)
Different kinds of yeasts have different personalities, so I recommend using the type of yeast indicated by a recipe. Good luck! Fresh bread is the BEST!